Data Collection Export
- Former user (Deleted)
- Florian Wilhelm (Unlicensed)
- Former user (Deleted)
This section covers all information about Exporting Mapp Pixels.
| Contents of the Table |
|---|
Description
Collecting data with the On-Site pixel(s) is fairly easy because it is just one line of JavaScript code and the implementation is one-off. The latter means that once the pixel is exported and implemented on the client's website it never has to be changed or replaced. Any configuration settings can be applied from within the DMP user interface and doesn't require a regeneration of the code. Moreover, after hitting the save button the On-Site pixel will automatically be redeployed within a couple of seconds to take all modifications into consideration. The script automatically collects pageviews and identifies valuable user intent patterns and it can serve as a container tag.
Guideline
A step-by-step guide on how to implement the on-site pixel:
Go to Data Collection > Create page in your DMP account.
Provide the Pixel Name and enable the relevant Modules.
Click on the Save and Export button.
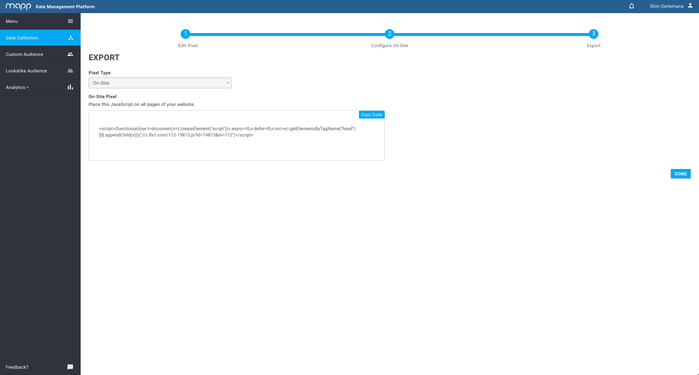
Select On-Site from the Pixel Type dropdown and click on Copy Code.
Place this code (Javascript) on your website. For an easy implementation we advise to put it in a centralized <head>Pixel</head> or <body>Pixel</body> section.
IFRAME
If you implement the pixel in an iframe it will only measure the actual loads and just a couple of other variables. Note that the event_url and/or referer_url in this case will also reference to the url of the iFrame. Custom attributes won't be captured outside iframe.
Handout
Description
Organizations can integrate data from all their media-buying activities by integrating the impression tracking pixel into their ad server campaigns. This section describes the general process for adding the impression tracking pixels into the ads in an ad server. All steps that can be executed within the DMP are described below. For the implementation part (in the particular ad server) check out the implementation entry.
Guideline
There are five general steps for implementing Mapp impression tracking pixels in an ad campaign:
Go to Data Collection and click on Create.
Provide the Pixel Name and ignore the Modules.
Click on the Save and Export button.
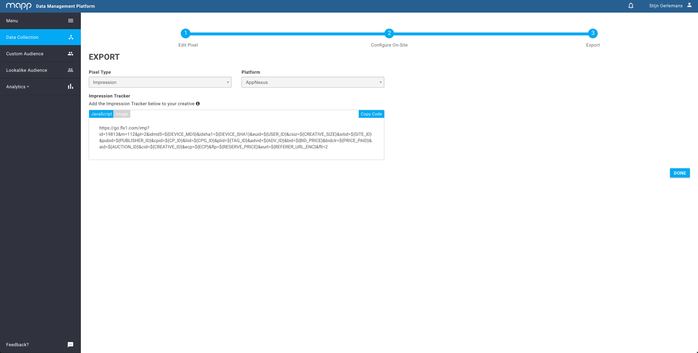
Select Impression from the Pixel Type dropdown and click on Copy Code.
Most ad servers support 3rd party tracking through one mechanism or another. Many ad servers include a user interface which lets you paste in third-party Impression tracker URLs. If your ad server doesn’t have a UI for trafficking third-party tracking URLs, you should still be able to include them at the creative level. Some ad servers offer creative templates that include options for third-party trackers. With other ad servers you might have to change the creative type to one that lets you enter or edit the HTML code for the creative.
Use Cases
Below a couple of use cases for the Impression Tracking Pixel feature.
- Lead Generation (Lookalikes): Empower the DMP Lookalike Audience feature by increasing the pool of possible lookalikes and generate better models for lead generation.
- Global Frequency Cap: Track impressions across all execution platforms in order to create a global frequency cap by means of a Custom Audience to use as a blacklist.
- User Profiling: Collect valuable data outside your client's domain to get an understanding of when and where you are serving ad impressions to your customers.
- Customer Journey: Gather insights on the full customer journey by also capturing impression events for each and every time a user is exposed to an advertisement of your brand.
Click Tracking Pixel
Description
Organizations can integrate data from all their media-buying activities by implementing the click tracking pixel into their ad server campaigns. This section describes the general process for adding the click tracking pixels into the ads in an ad server. All steps that can be executed within the DMP are described below. For the implementation part (in the particular ad server) check out the implementation entry.
Guideline
There are five general steps for implementing Mapp impression tracking pixels in an ad campaign:
Go to Data Collection and click on Create.
Provide the Pixel Name and ingore the Modules.
Click on the Save and Export button.
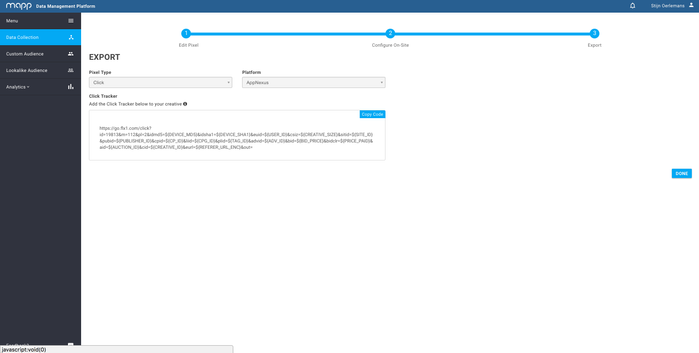
Select Click from the Pixel Type dropdown and click on Copy Code.
Tips
Most ad servers support 3rd party click trackers and offer a feature to simply copy/paste a click tracking template as part of the user interface. In addition, most execution platforms do have a landing page URL macro available that can be set as value for the "out" parameter to automatically redirect to the landing page that is set on another level (i.e. advertiser or campaign). If this is not supported you can either put the click tracking pixel in front of the landing page url or add it to the creative code that will be trafficked directly into your ad server.
Use Cases
Below a couple of use cases for the Click Tracking Pixel feature.
- Lead Generation (Lookalikes): Empower the DMP Lookalike Audience feature by increasing the pool of possible lookalikes and generate better models for lead generation.
- Scoring Model: Track clicks across all execution platforms and assign a score/value in order to track a users' interaction with an ad.
- User Profiling: Collect valuable data outside your client's domain to get an understanding of when and where you have been serving ad impressions on which the customer clicked.
- Customer Journey: Gather insights on the full customer journey by also capturing click events for each and every time a user is exposed to an advertisement of your brand and clicked on it.