DIY Integrations
This entry provides information about DIY (do-it-yourself) integrations which allow you to setup and maintain DMP outbound integrations (i.e. pushing audiences to any 3rd party execution platform).
| Contents of the Table |
|---|
Definitions
- DMP: Data Management Platform
- DIY integration: do-it-yourself custom integration mechanism
- Endpoint: URL that is used to connect to the DIY integration
Concept
The diagram below outlines the conceptual flow of a DIY integration.
.png?version=1&modificationDate=1497341604000&cacheVersion=1&api=v2&width=800&height=170)
Endpoint Requirements
The endpoint needs to:
- Be exposed over HTTPS.
- Be available from the public internet.
- Listen to GET (validation only) and POST methods.
- Respond 200 OK in all successful scenarios.
- no response is required unless explicitly stated otherwise.
- Validate the HMAC header.
- Respond as quickly as possible to the requests from the DMP
- User upload should aim for < 1 second 99 percentiles
- Segment creation should aim for < 3 seconds 99 percentiles
Compatibility
The DMP can add additional fields at any point in time in order to provide more data. Please keep in mind that this doesn't break your code.
Responsibilities
DMP
- Send notification on the creation of a new audience.
- Send mutations of users being appended to an audience.
DIY Integration
- Convert the requests from the DMP in the appropriate API format of the 3rd party system.
- Maintain mapping between the unique audience ID (e.g. a5940e473cea659.356693871497425011) and the ID that is created in the 3rd party system (e.g. 1234567890).
- Secure store any credentials that are needed to authenticate with the 3rd party system.
Request Authentication
Due to the nature of data being transferred it's sufficient to only have HTTPS and HMAC validation. In addition it is recommended to use Basic Auth as additional layer.
Request Authenticity
We provide a HMAC SHA1 signature on all POST transfers which allows you to verify the authenticity of the request and it's payload (the string representation of the request body, the JSON). The header is sent as hexadecimal string value, example X-HMAC: a94a8fe5ccb19ba61c4c0873d391e987982fbbd3
Validation
During setup of the DIY integration a POST request to the provided endpoint will be executed, it needs to respond with a 200 OK (no body is required) in order to continue setup.
Example: POST https://my-endpoint.com/?type=VALIDATE
Create Audience
During creation of a new segment in the system a POST request will be executed with a JSON payload (Content-Type: application/json)
Example: POST https://my-endpoint.com/?type=CREATE_AUDIENCE
{
    "Type": "CREATE_AUDIENCE",
    "Name": "Test audience",
    "Customer": 123,
    "Audience": "a5940e473cea659.356693871497425011"
}
It is possible to provide a human friendly error by returning a non-200 response status. It will then look for the JSON key "error" or fallback to the entire response body in case of non-valid JSON.
By default we create a new Audience ID (in the above example a5940e473cea659.356693871497425011). You can however also ignore that and return us with your own ID, or forward the ID created in the 3rd party system. We will then use that ID in subsequent "Add to Audience"-calls which reduces the need for maintaining a mapping in your service. In order to do that you need to return a JSON key "id" in your 200 OK response, like
{"id":"12345"}
Add to Audience / Remove from Audience
During audience change in the system a POST request will be executed with a JSON payload (Content-Type: application/json).
Please be aware of the fact that the Mutation array will likely contain multiple entries for users being added/removed to one or multiple audiences. This micro-batching mechanism is configured to send once it contains 100 users, or when 1 second is past: whatever comes first. This configuration is subject to change at any point in time without prior notification.
We recommend to process those mutations in parallel to reduce the latency of your endpoint given the response time requirements. In addition it may be advisable to put the received JSON payloads after in a message queue (in Google that would be PubSub, in AWS that may be SQS) and process them asynchronously in the background. That allows you to quickly respond after validating the payload and headers, while still allowing you for enough time to forward the request to the 3rd party system.
Example Add: POST https://my-endpoint.com/?type=ADD_TO_AUDIENCE
{
    "Type": "ADD_TO_AUDIENCE",
    "Mutations": [{
        "Uuid": "ab043529-3e55-4672-52f0-18887ea12345",
        "Audience": "a5940e473cea659.356693871497425011",
        "Customer": 123,
        "Platform": 113,
        "External_user_id": "12478286329"
    }]
}
Example Remove: POST https://my-endpoint.com/?type=REMOVE_FROM_AUDIENCE
{
    "Type": "REMOVE_FROM_AUDIENCE",
    "Mutations": [{
        "Uuid": "ab043529-3e55-4672-52f0-18887ea12345",
        "Audience": "a5940e473cea659.356693871497425011",
        "Customer": 123,
        "Platform": 113,
        "External_user_id": "12478286329"
    }]
}
DIY Integration Activation
Once the DIY integration has been finalised it needs to be activated for the relevant client(s). This must be done in the DMP instance of the client. Go to Settings > Integrations > Mapp Self-Service and provide the requested details as described here.
Example
Below an example of a DIY integration. Note: This example uses Google Cloud Functions
In order to help you get started with DIY integrations there is an example DIY integration available which runs on Google Cloud Functions. The example DIY integration integrates with our Test Platform which is called Pangolin. Pangolin is a fully functional fake target platform to which you can push audiences and users. Click here to download the source code of the DIY Example Integration. The code is written in NodeJS and is a fully functional NPM package. In order to deploy the code to Google Cloud Functions please follow the following steps:
1. Create new Cloud Function
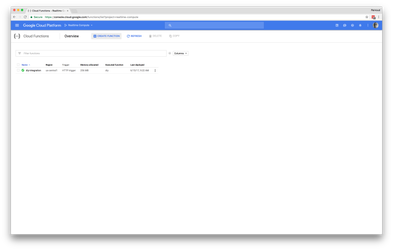
2. Configure and save Cloud Function
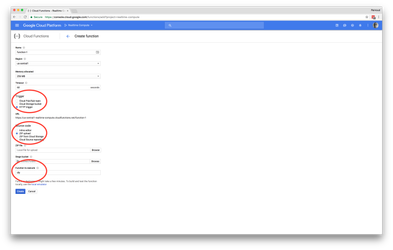
Be sure to pay attention in to the marked fields:
- Trigger: Choose HTTP Trigger
- Source code: Upload the zip provided under the link above
- Function to execute: diy . This is the name of the function in index.js that is going to be executed for each incoming HTTP-request
- Stage bucket: Select a Google Cloud Storage bucket where the uploaded zip can be saved. You can either select an existing bucket or create a new on.
- For all other fields choose as you see fit