...
Step | Description |
|---|---|
Go to Mapp Cloud HTTP address which will be provided to you by your respective Account Manager. | |
2. | Open side menu (left navigation bar) and go to Administration -> Channels: 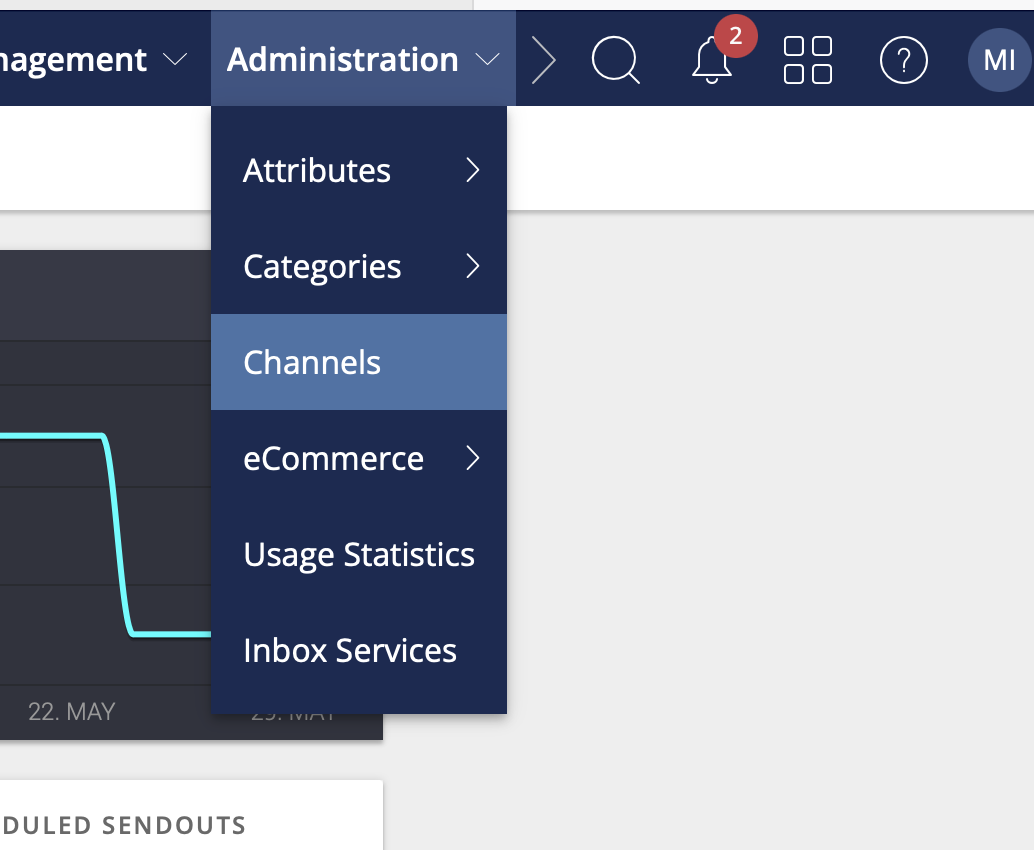 |
3. | Select your iOS channel. You will probably have two channels available - one for Production and one for Development. 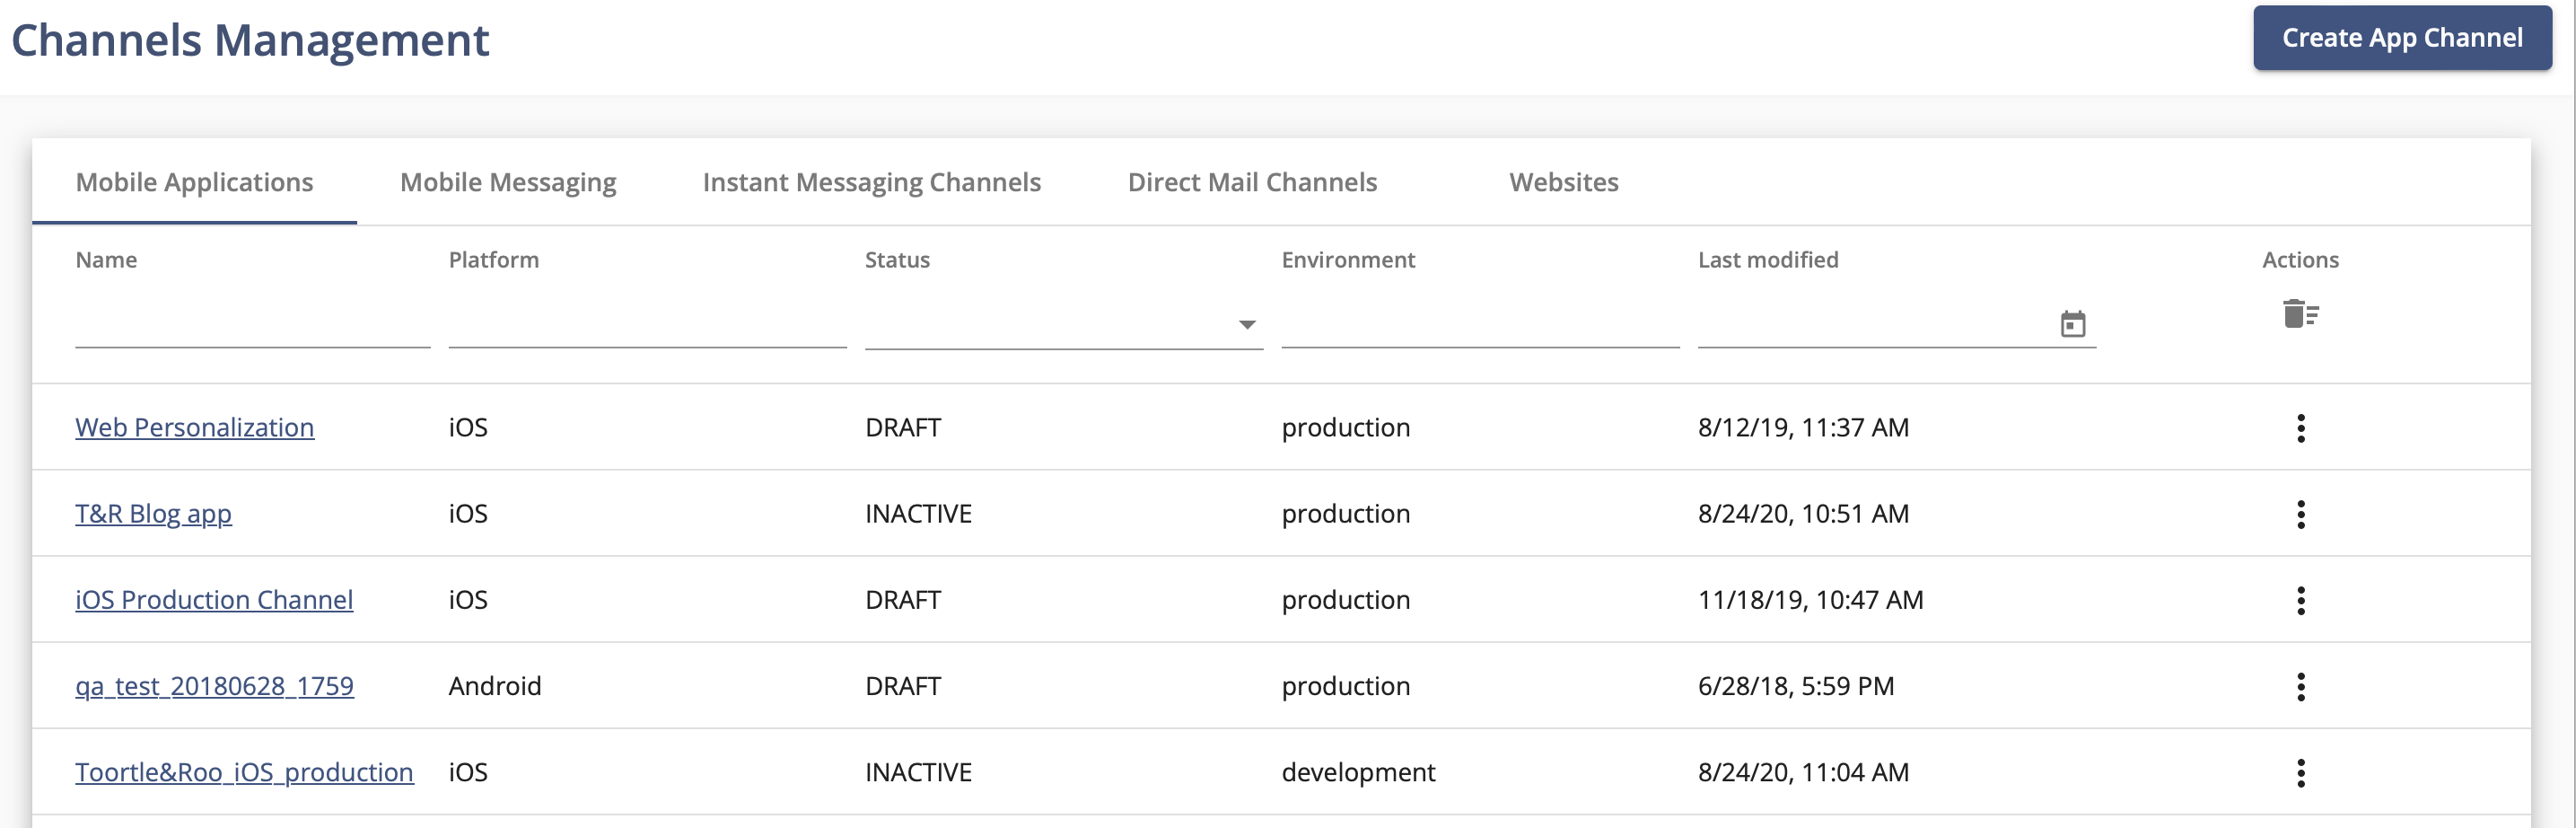
|
4. | Once you have selected respective channel, screen for editing various parameters will open (below is screenshot example). You can add App Store ID and make sure Bundle ID is the same as one in the project. You can select theProduction or Development environment, so for each environment, you will have a different certificate. You will need to export that certificate from your Keychain and protect it with a password (password needs to be added after a certificate is uploaded). 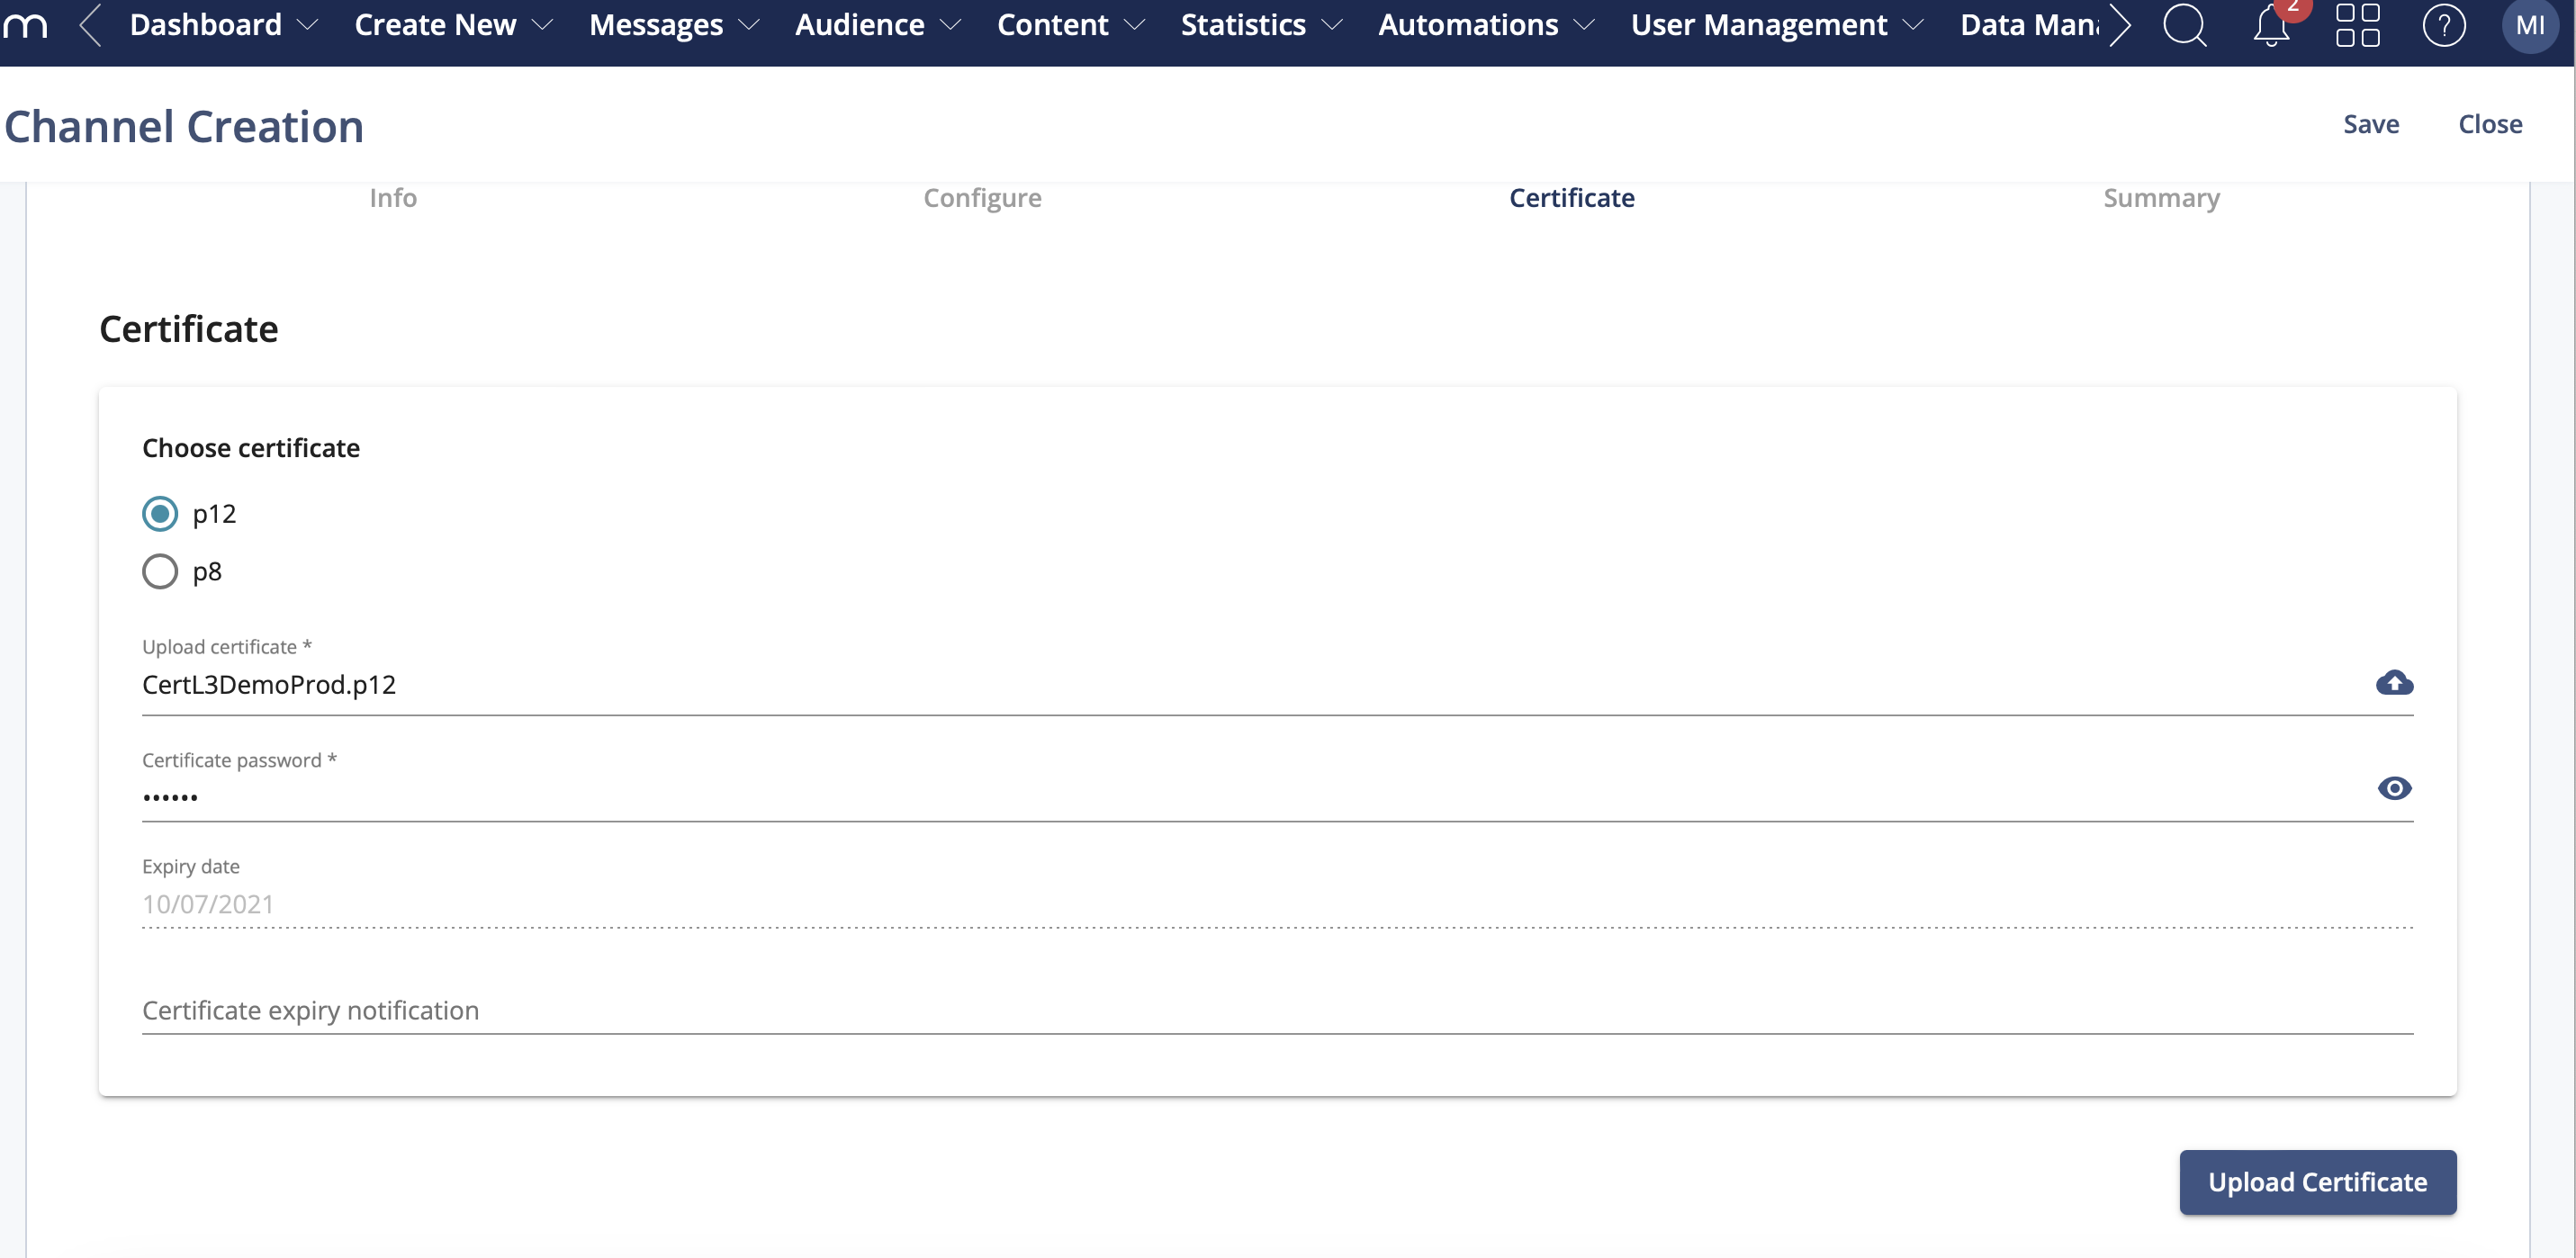 |
5. | To add sounds for remote notifications, you will need to hardcode them into your project. After that, you will add those same sound names to the page below (continuation of the page from step 4, within the marked area): 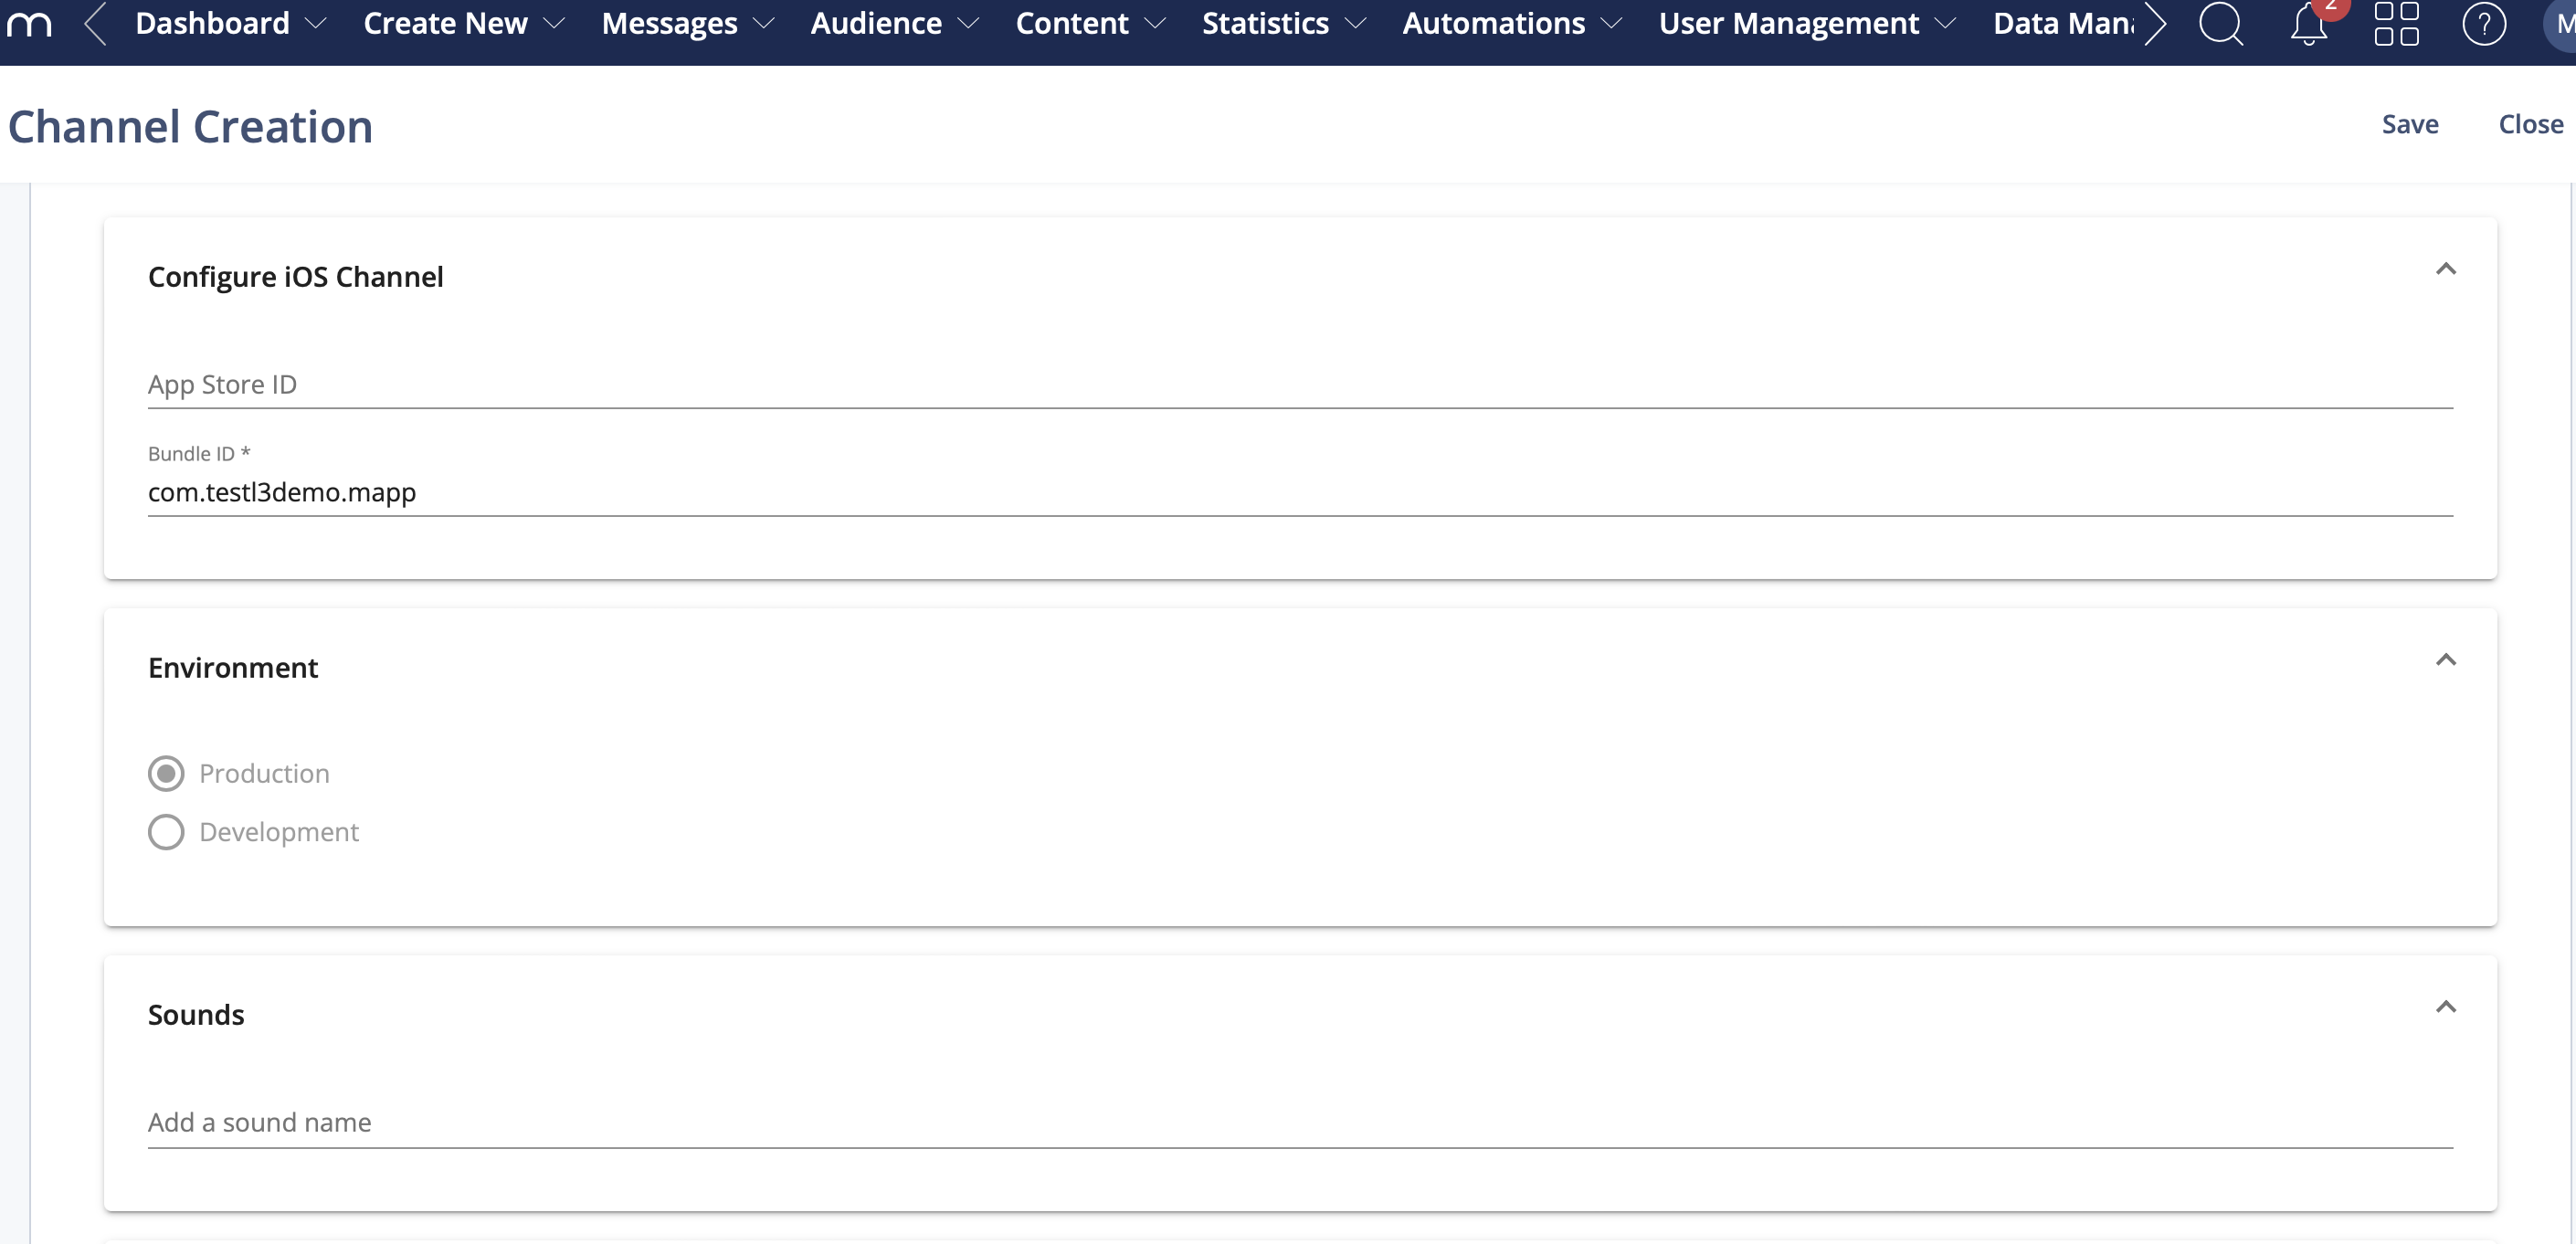 |
6. | To finish setting the channel, the final thing is to check if you want to enable engagement via Push Notifications and/ or In-app messages: 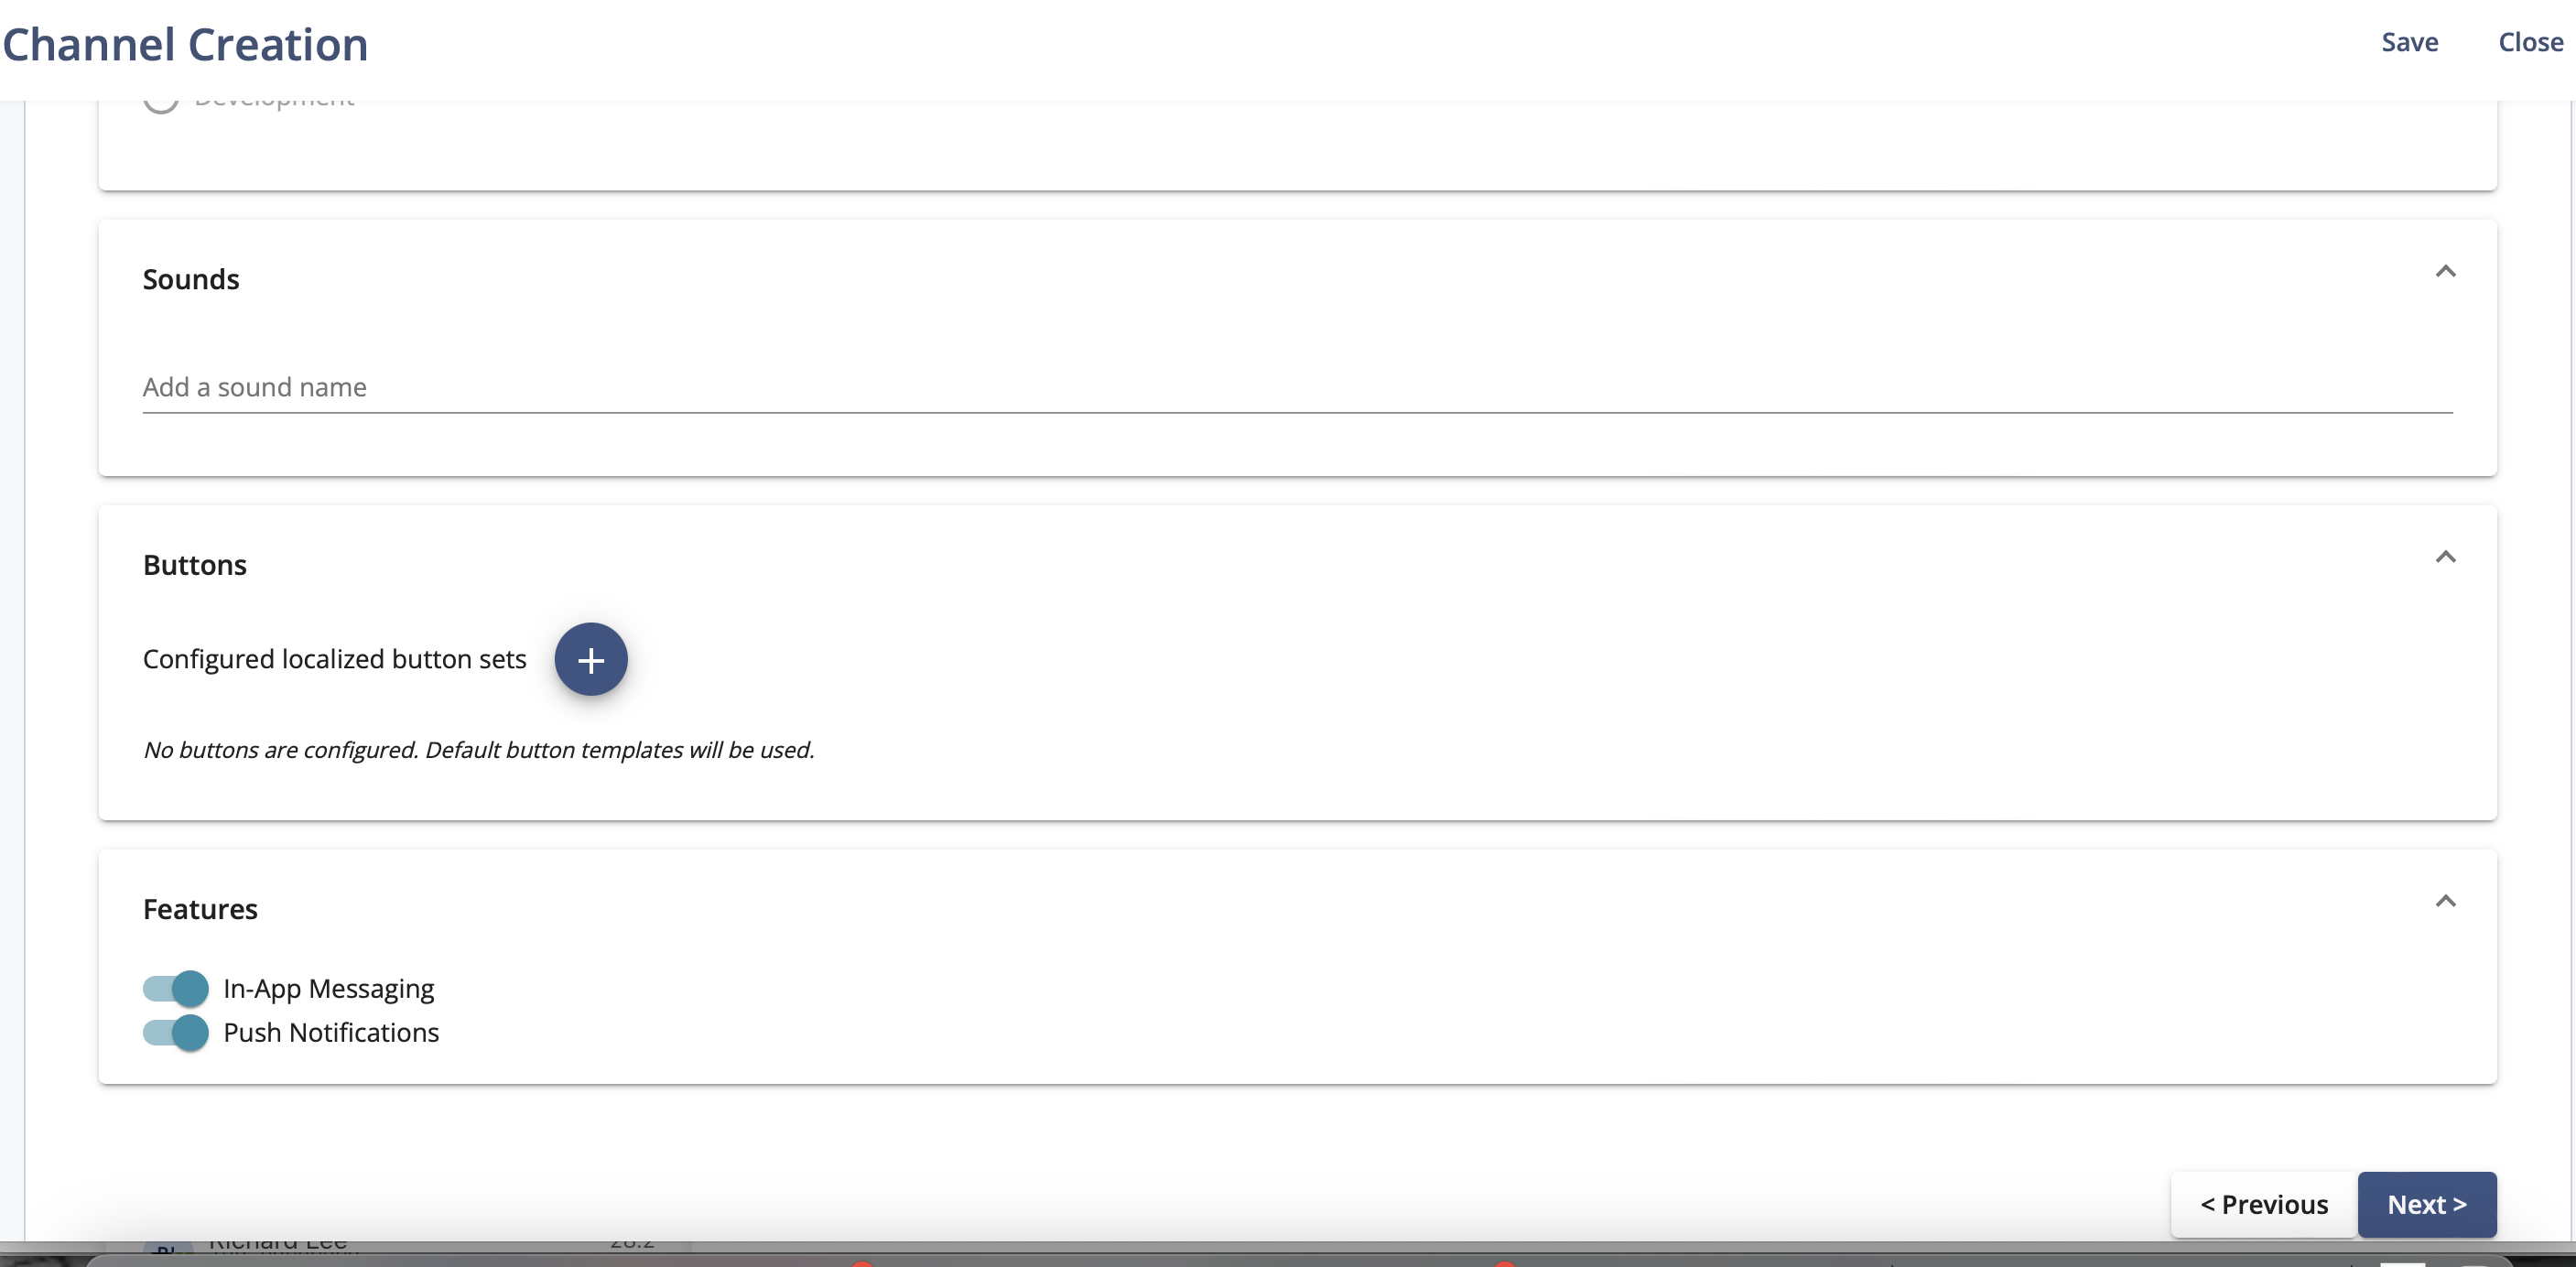 |
7. | Once all the parameters are defined, you will press SAVE. Once you see the notification at the bottom of the screen about the successfully saved channel, you can press ACTIVATE and complete your channel set up. 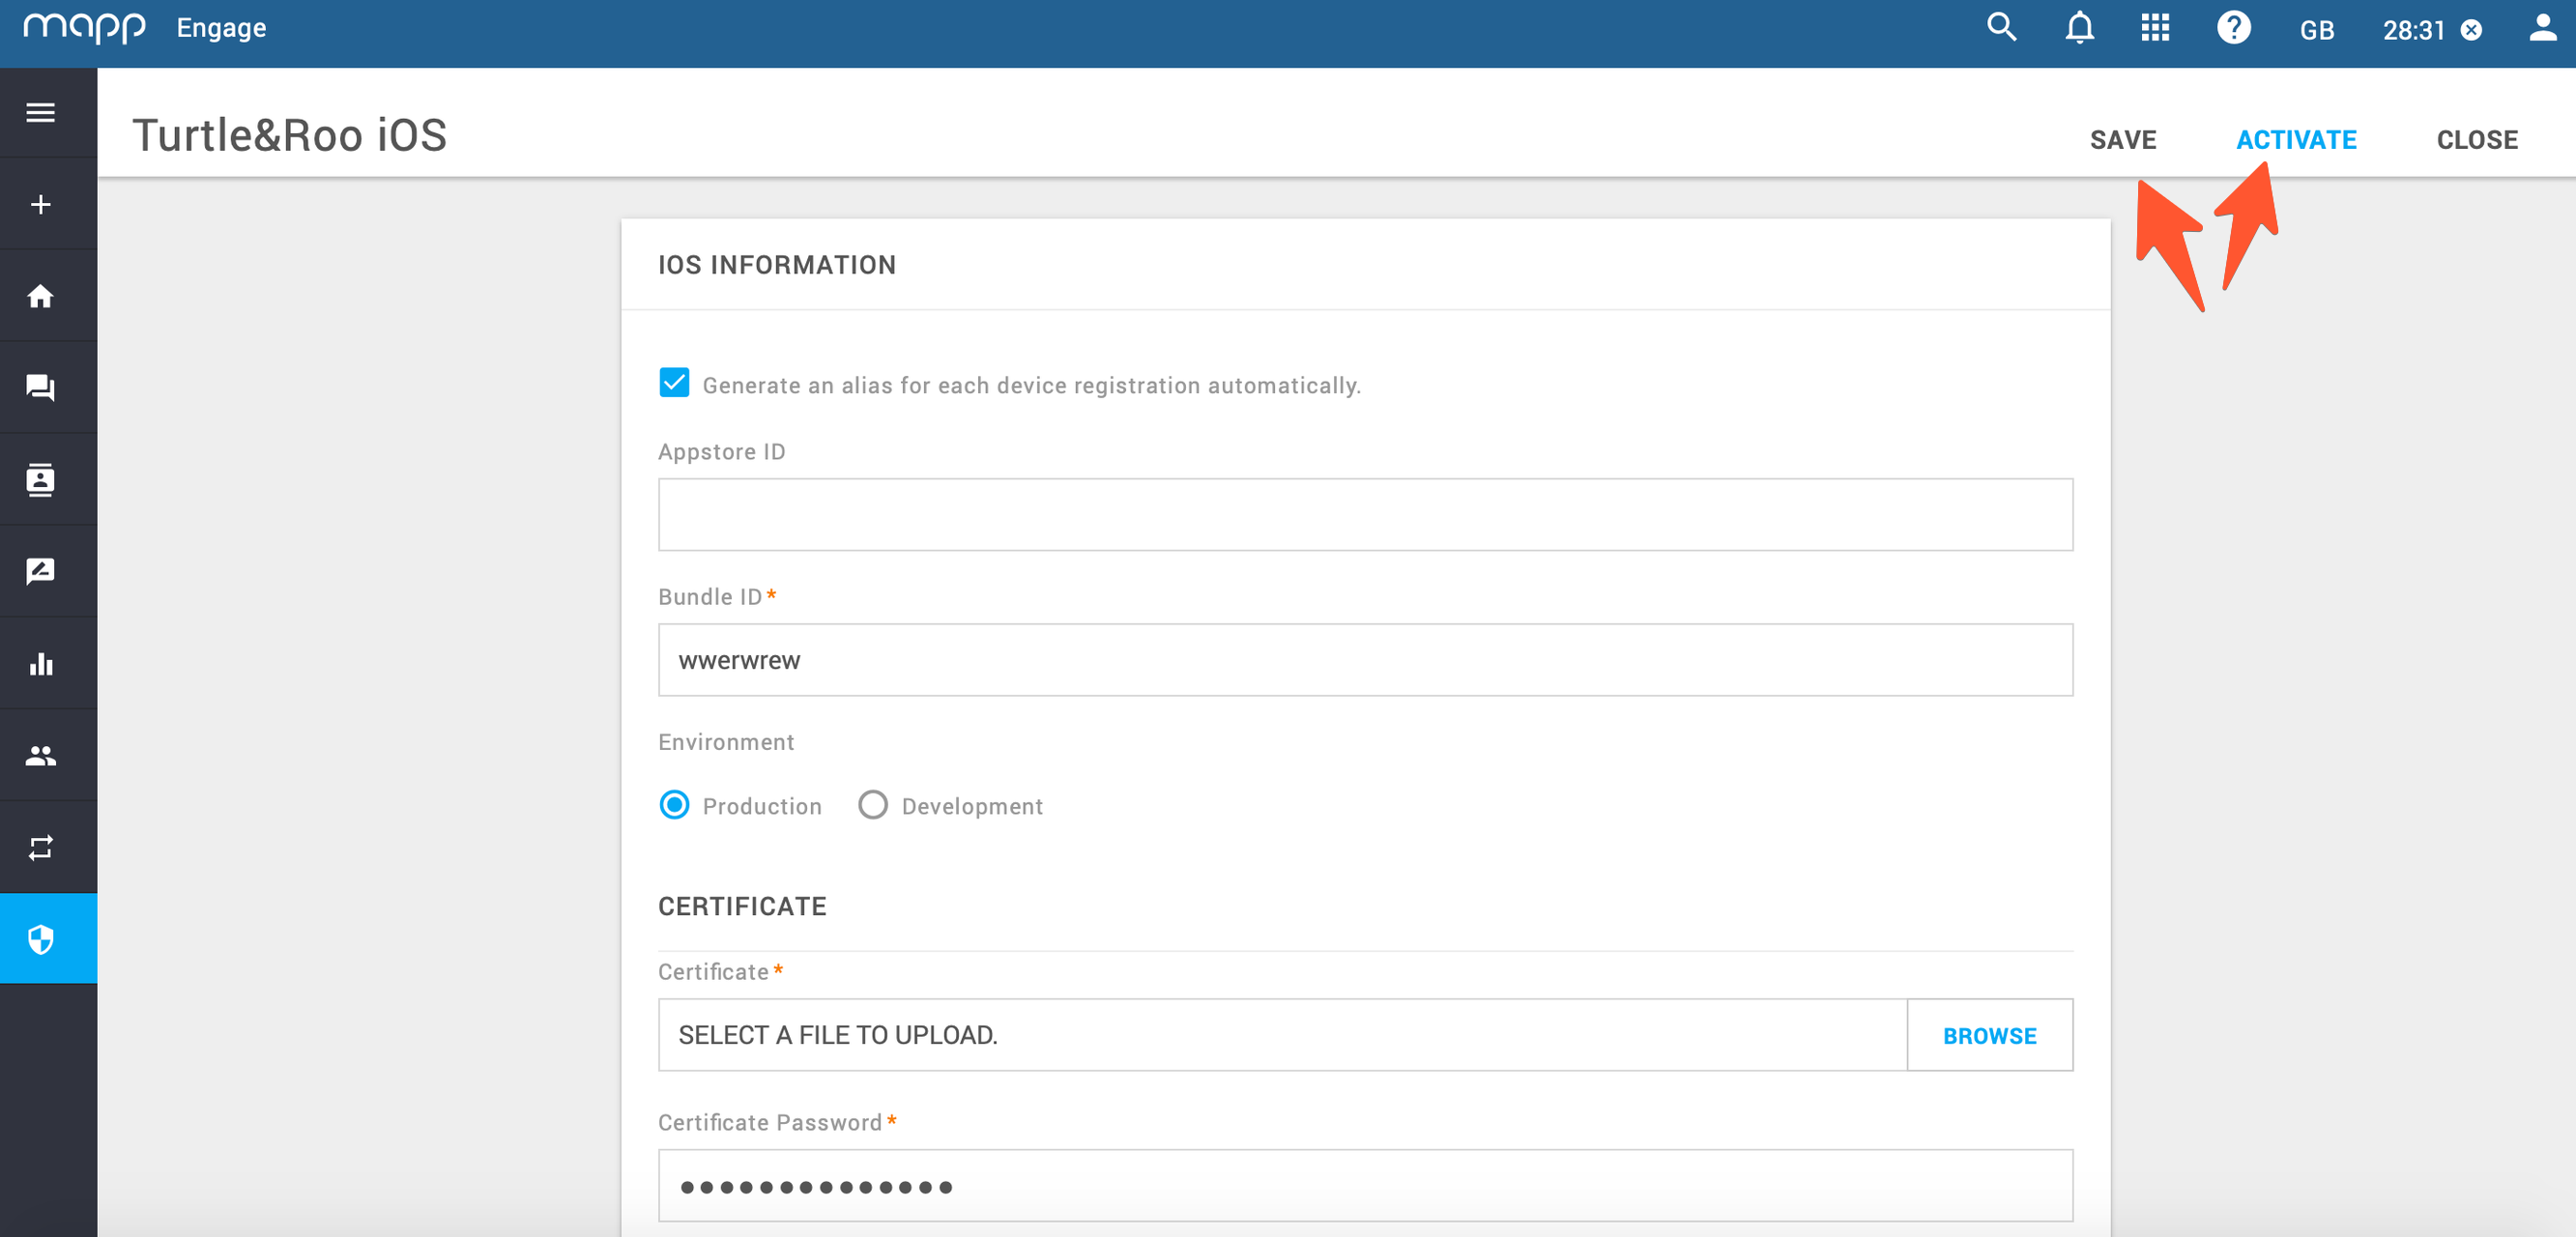 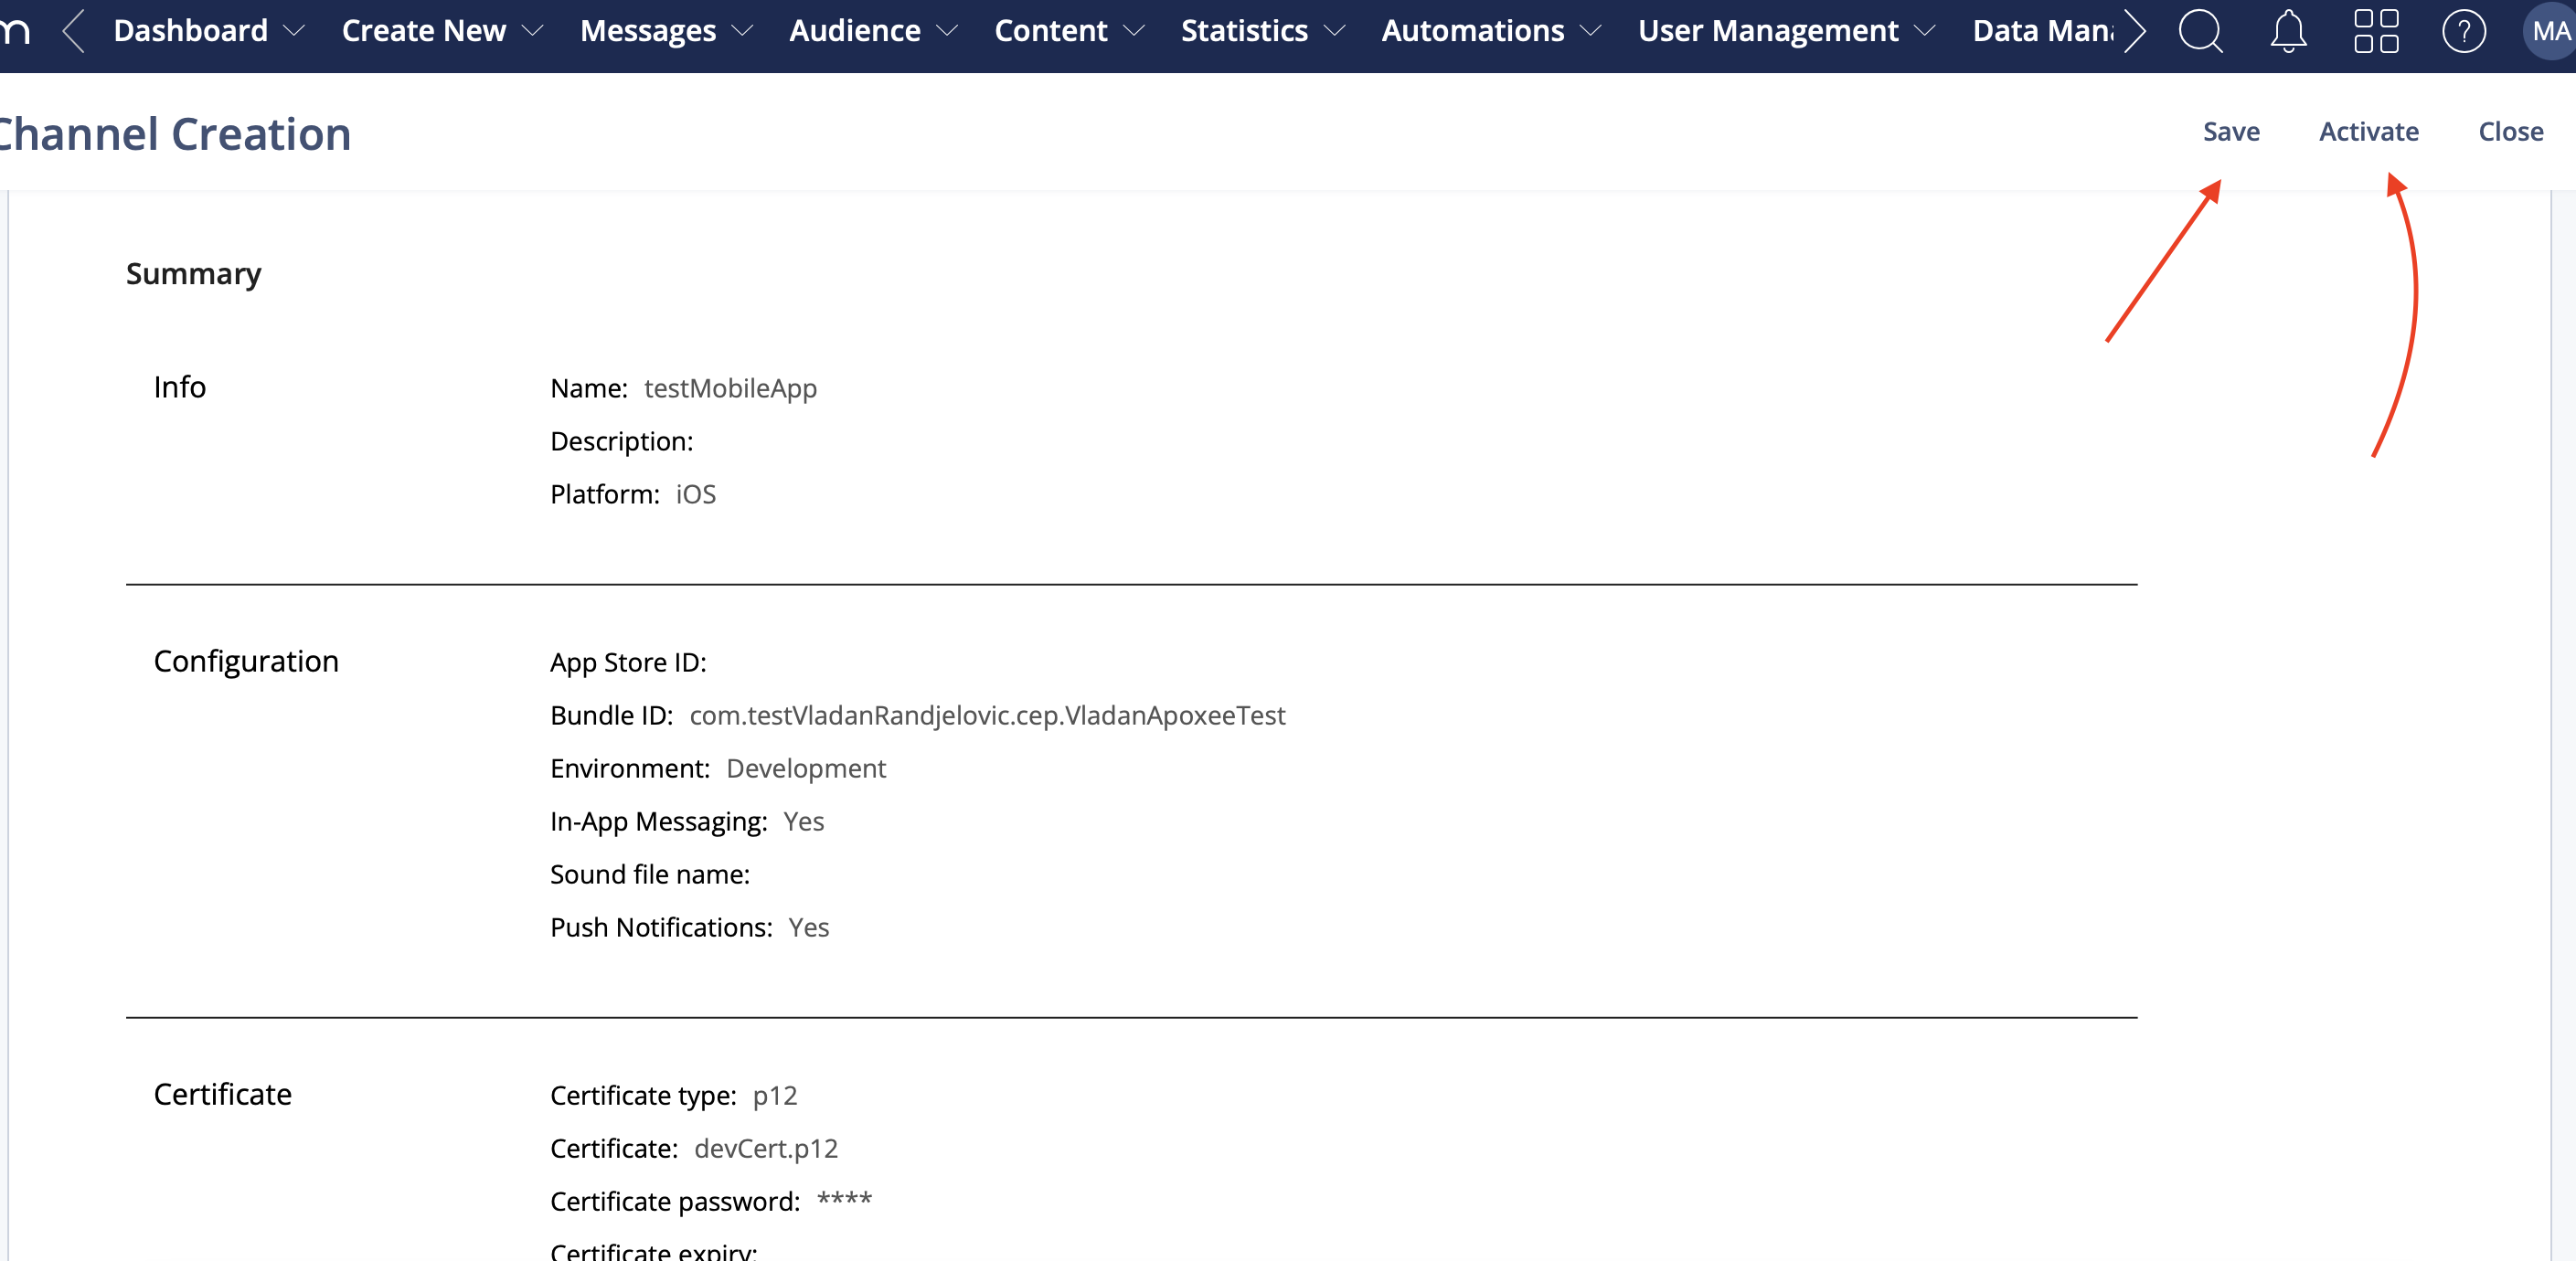 |